by Drew | Sep 19, 2012 | Blog Posts, Remote Desktop, Utilities |
I have always found Windows Remote Desktop to be adequate but not great especially with regards to multiple instances. After some research I stumbled across a fantastic open source REMOTE DESKTOP APPLICATION called Terminals.
User Interface
- Multi tab interface
- Open terminal in full screen, switch between full screen mode
- Resizable terminal window
- Attached and dettached Windows
- Connections history
- Customizable toolbars
- Open custom application from Terminals window
- Toolbar for computer control panel applets
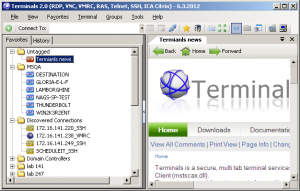
Terminals Favorites
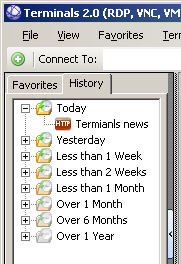
Terminals History
Connection Options
- Select one of available protocols and custom port
- Terminal fonts and colors (ssh)
- Automatically connect with stored credentials
- Custom connection icon
- Screen size and screen mode (RDP)
- Before connection scripts
- Organize connections by Tags
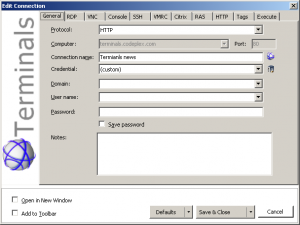
Terminals Edit Connections
Manage Favorites
- Import from other file formats
- Search computers in Active directory
- Search computers in your network by IP addresses
- Automatic import RDP connection from registry

Terminals Organize Favorites
Networking tools
- Ping
- Tracert
- DNS tools
- Wake on lan
- Port scanner
- Shares
- Services
- Who is?
- Interfaces

Terminals Networking Tools
Credentials Manager
- Store your connections credentials in secured file, so you don’t have to retype them when connecting
- Reuse them for more then one connection
- Define default connection credentials
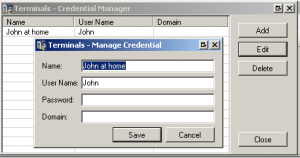
Terminals Credentials Manager
Capture Manager
- Create screen shots of your terminal sessions
- Manage and view captured pictures
- Automated capture for all opened sessions
- Publish your captures gallery on Flicker
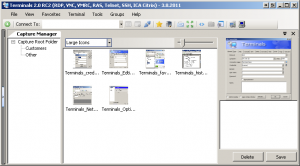
Terminals Capture Manager
Application Options
- Define connections interface behavior
- Set application master password and other security
- Define settings files directory
- Define capture behavior
- Synchronize your configuration to Amazon S3
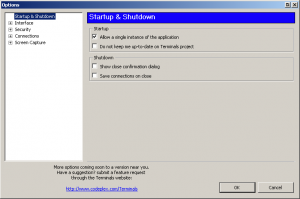
Terminals Options
Other screen shots and a brief list of the feature is also at weblog.aspnet.net
by Drew | Sep 19, 2012 | Blog Posts, Remote Desktop |
Applies To: Windows Server 2008 R2
You can use the RemoteApp Wizard to create a Remote Desktop Protocol (.rdp) file from any program in the RemoteApp Programs list. For more information about how to distribute .rdp files to users, see Distribute RemoteApp Programs to Users.
Membership in the local Administrators group, or equivalent, on the RD Session Host server that you plan to configure, is the minimum required to complete this procedure. Review details about using the appropriate accounts and group memberships at http://go.microsoft.com/fwlink/?LinkId=83477.
To create an .rdp file
- On the RD Session Host server, open RemoteApp Manager. To open RemoteApp Manager, click Start, point to Administrative Tools, point to Remote Desktop Services, and then click RemoteApp Manager.
- In the RemoteApp Programs list, click the program that you want to create an .rdp file for. To select multiple programs, press and hold the CTRL key when you click each program name.
- In the Actions pane for the program or selected programs, click Create .rdp File.
 Note Note |
| If you selected multiple programs, the settings described in the rest of this procedure apply to all of the selected programs. A separate .rdp file is created for each program. |
- On the Welcome to the Remote App Wizard page, click Next.
- On the Specify Package Settingspage, do the following:
- In the Enter the location to save the packages box, accept the default location or click Browse to specify a new location to save the .rdp file.
- In the Remote Desktop Session Host settings area, click Change to modify the server name or the Remote Desktop Protocol (RDP) port number. When you are finished, click OK.
- In the RD Gateway settings area, click Change to modify or to configure whether clients will use an RD Gateway server to connect to the target RD Session Host server across a firewall. (For more information about these settings, see Configure Remote Desktop Gateway Settings.) When you are finished, click OK.
- To digitally sign the .rdp file, in the Certificate settings area, click Change to select or to change the certificate to use. (For more information, see About Digitally Signing RemoteApp Programs.) Select the certificate that you want to use, and then click OK.
- When you are finished, click Next.
- On the Review Settings page, click Finish.When the wizard is finished, the folder where the .rdp file was saved opens in a new window. You can confirm that the .rdp file was created.
Additional references
Configuring RemoteApp Programs
by Drew | Sep 19, 2012 | Blog Posts, Remote Desktop, Tips,Tricks, Window 7 |
Here is how to resolve this problem:
- Click on Start, and then in the search bar type:
gpedit.msc
- Expand Computer Configuration, Expand Administrative Templates, Expand System, Expand Credentials Delegation
- Double Click on “Allow Delegating Default Credentials with NTLM-only Server Authentication“. Click the “Show…” button, Enter the following:
TERMSRV/*
- Click OK, to close the Show Contents Window, Click OK again to close the next window.
- Double Click on “Allow Delegating Saved Credentials with NTLM-only Server Authentication“. Click the “Show…” button, Enter the following:
TERMSRV/*
- Click OK, to close the Show Contents Window, Click OK again to close the next window.
- Click on Start, and then in the search bar type:
GPUPDATE /FORCE
Windows 7 Not Remembering Remote Desktop Credentials


 Note
Note
